
我使用vue-amap组件显示marker点,部分代码如下
<el-amap-marker v-for="marker in markers" :key="marker.index" :position="marker.position" :events="marker.events" ></el-amap-marker>
#####点击高亮的思路
我的思路是点击之后修改icon的样式,但该如何使得下次点击后前一次的图标变回蓝色呢
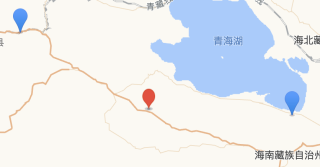
在下方method方法中的显示marker的方法中,点击事件e.target.setIcon(afticon);成功在点击后变换红色图标,结果如下
在vue的method中的部分代码
Point() {
      let markers = [];
      let windows1 = [];
      let srcLists1=[];
      let myicon=[];
      let that = this;
      let afticon=new AMap.Icon({
        //size: new AMap.Size(30, 35),//图标大小
        imageSize:new AMap.Size(35, 35),
        //image: "../../static/5.png"
        image: "//a.amap.com/jsapi_demos/static/demo-center/icons/poi-marker-red.png"
      });
      let beficon=new AMap.Icon({
        //size: new AMap.Size(19, 31),//图标大小
        imageSize:new AMap.Size(28, 28),
        //image:"../../static/7.png"
        image: "//a.amap.com/jsapi_demos/static/demo-center/icons/poi-marker-blue.png"
      });
      //let showed=e.target.setIcon(afticon);
      this.CollectPoint.forEach((item, index) => {
        markers.push({
          position: item.position,
          offset: new AMap.Pixel(-10, -10),
          icon:beficon, //不设置默认蓝色水滴
          events: {
            click(e) {
               //let showered=e.target.setIcon(afticon);
              that.srcList1 = that.srcLists1[index];
              // 方法:鼠标移动到点标记上,显示相应窗体
              that.windows1.forEach((window1) => {
                window1.visible = false; // 关闭窗体
              });
              that.window1 = that.windows1[index];
              that.$nextTick(() => {
                that.window1.visible = true;
                e.target.setIcon(afticon);
                that.$refs.map.$$getInstance().setZoomAndCenter(6,item.position)
              });
            },
          },
        });
        windows1.push({
          name:item.name,
          recorder:item.recorder,
          position: item.position,
          offset: [0, -20], // 窗体偏移
          showShadow: false,
          visible: false, // 初始是否显示
        });
        srcLists1.push({
          photos:item.url4,
          lont:item.lont,
          lat:item.lat,
          gaocheng:item.gaocheng,
          recorder:item.recorder,
          name:item.name,
          wea:item.weather,
          dtm:item.dtm,
          place:item.place,
        });
      });
      //  加点
      this.markers = markers;
      // 加弹窗
      this.windows1 = windows1;
      this.srcLists1 =srcLists1;
    }
但如何写使得点击下一个点之后,前一个点可以变回原来的蓝色图标,就是如何修改这个events中的click里的事件


