python+fastrcnn目标识别,模板图根据目标识别到硬盘和电话卡的boxes框,检测图1、2也有硬盘和电话卡,但是检测图的位置是会动的,上下左右动,可以倾斜放置,检测图和模板图使用sift特征匹配矫正得到一个矩阵,怎么根据模板图硬盘和电话卡识别的boxes框和这个矫正矩阵把位置画到检测图1、2中硬盘和电话卡的位置上
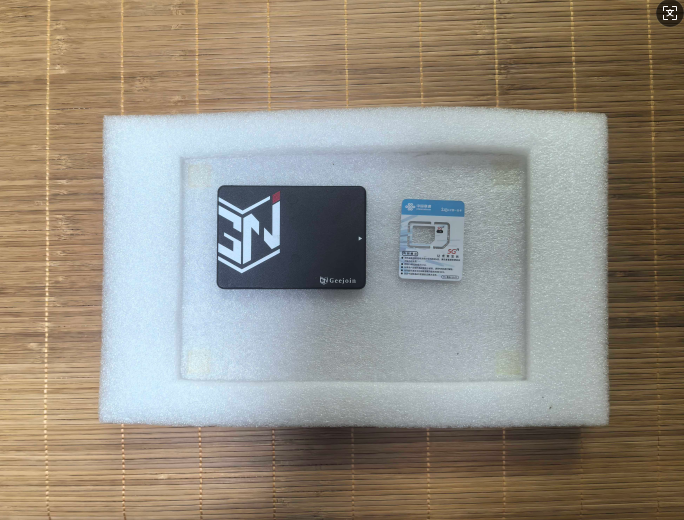
模板图:
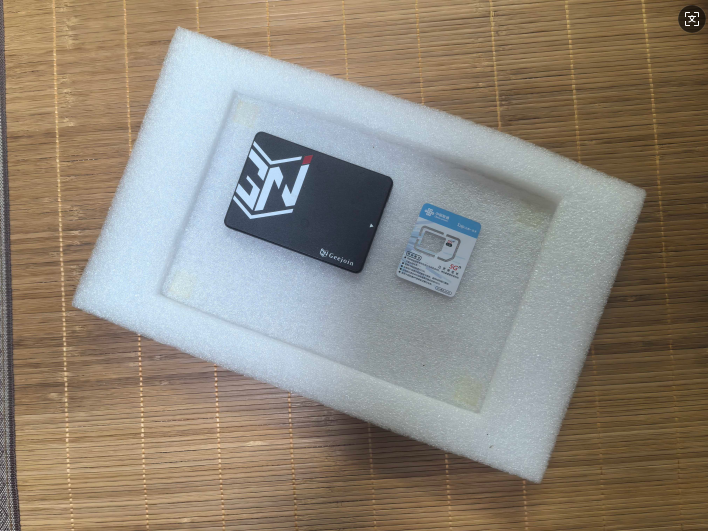
检测图1:
·
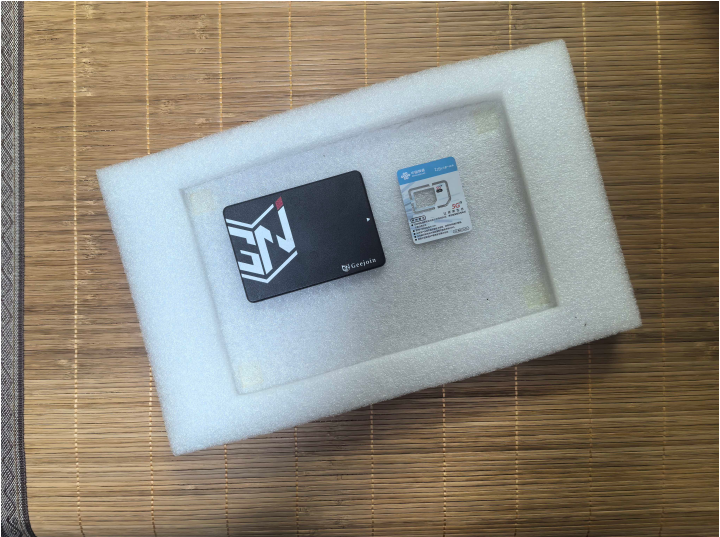
检测图2:

python+fastrcnn目标识别,模板图根据目标识别到硬盘和电话卡的boxes框,检测图1、2也有硬盘和电话卡,但是检测图的位置是会动的,上下左右动,可以倾斜放置,检测图和模板图使用sift特征匹配矫正得到一个矩阵,怎么根据模板图硬盘和电话卡识别的boxes框和这个矫正矩阵把位置画到检测图1、2中硬盘和电话卡的位置上
模板图:
检测图2:
 分享
分享
上午好☀️☀️☀️️
本答案参考通义千问
要将目标识别的坐标框(boxes)从模板图应用到检测图1和检测图2上,关键在于使用SIFT特征匹配得到的矫正矩阵(变换矩阵),将模板图中的目标位置“映射”到检测图中。以下是详细步骤和解决方案:
使用OpenCV提取两幅图像的SIFT特征点,并进行匹配。
import cv2

# 加载图像
template_img = cv2.imread('template.jpg')
detect_img1 = cv2.imread('detect1.jpg')

# 初始化SIFT检测器
sift = cv2.SIFT_create()

# 提取关键点和描述符
kp1, des1 = sift.detectAndCompute(template_img, None)
kp2, des2 = sift.detectAndCompute(detect_img1, None)

# 使用FLANN匹配器进行匹配
flann = cv2.FlannBasedMatcher()
matches = flann.knnMatch(des1, des2, k=2)

# 筛选好的匹配点
good_matches = []
for m, n in matches:
    if m.distance < 0.7 * n.distance:
        good_matches.append(m)

# 获取匹配点的坐标
src_pts = np.float32([kp1[m.queryIdx].pt for m in good_matches]).reshape(-1, 1, 2)
dst_pts = np.float32([kp2[m.trainIdx].pt for m in good_matches]).reshape(-1, 1, 2)
使用RANSAC算法去除异常匹配点,计算单应性矩阵 H(适合平面物体的投影变换)。
H, _ = cv2.findHomography(src_pts, dst_pts, cv2.RANSAC, 5.0)
注意: 如果检测图存在倾斜或旋转,建议使用
cv2.findHomography(),如果只是平移和缩放,可用cv2.estimateAffine2D()。
假设你已经用Faster R-CNN在模板图中得到了目标框(例如 boxes_template = [[x1, y1, x2, y2], ...]),现在需要将其转换到检测图1中。
def transform_box(box, H):
    # box格式: [x1, y1, x2, y2]
    # 转换为4个角点 (x1,y1), (x2,y1), (x2,y2), (x1,y2)
    corners = np.array([
        [box[0], box[1]],
        [box[2], box[1]],
        [box[2], box[3]],
        [box[0], box[3]]
    ], dtype=np.float32).reshape(-1, 1, 2)

    # 应用单应性变换
    transformed_corners = cv2.perspectiveTransform(corners, H)

    # 计算新的边界框
    transformed_points = transformed_corners.reshape(-1, 2)
    x_coords = transformed_points[:, 0]
    y_coords = transformed_points[:, 1]

    new_x1 = np.min(x_coords)
    new_y1 = np.min(y_coords)
    new_x2 = np.max(x_coords)
    new_y2 = np.max(y_coords)

    return [new_x1, new_y1, new_x2, new_x2]
boxes_template = [[100, 100, 200, 200], [300, 150, 400, 250]]  # 示例模板框
boxes_detect1 = []

for box in boxes_template:
    transformed_box = transform_box(box, H)
    boxes_detect1.append(transformed_box)
detect_img1_copy = detect_img1.copy()

for box in boxes_detect1:
    x1, y1, x2, y2 = map(int, box)
    cv2.rectangle(detect_img1_copy, (x1, y1), (x2, y2), (0, 255, 0), 2)

cv2.imwrite('detect1_with_boxes.jpg', detect_img1_copy)
| 优化点 | 说明 | |--------|------| | 使用RANSAC过滤异常点 | 提高匹配精度 | | 使用更鲁棒的特征匹配算法 | 如ORB、SURF等 | | 多图处理时保存H矩阵 | 避免重复计算 | | 对于不同角度的图片,使用仿射变换 | 更适合非平面对象 |
import cv2
import numpy as np

# 1. 加载图像
template_img = cv2.imread('template.jpg')
detect_img1 = cv2.imread('detect1.jpg')

# 2. SIFT特征提取
sift = cv2.SIFT_create()
kp1, des1 = sift.detectAndCompute(template_img, None)
kp2, des2 = sift.detectAndCompute(detect_img1, None)

# 3. 特征匹配
flann = cv2.FlannBasedMatcher()
matches = flann.knnMatch(des1, des2, k=2)

good_matches = [m for m, n in matches if m.distance < 0.7 * n.distance]

src_pts = np.float32([kp1[m.queryIdx].pt for m in good_matches]).reshape(-1, 1, 2)
dst_pts = np.float32([kp2[m.trainIdx].pt for m in good_matches]).reshape(-1, 1, 2)

# 4. 计算单应性矩阵
H, _ = cv2.findHomography(src_pts, dst_pts, cv2.RANSAC, 5.0)

# 5. 定义转换函数
def transform_box(box, H):
    corners = np.array([
        [box[0], box[1]],
        [box[2], box[1]],
        [box[2], box[3]],
        [box[0], box[3]]
    ], dtype=np.float32).reshape(-1, 1, 2)
    transformed_corners = cv2.perspectiveTransform(corners, H)
    transformed_points = transformed_corners.reshape(-1, 2)
    x_coords = transformed_points[:, 0]
    y_coords = transformed_points[:, 1]
    return [np.min(x_coords), np.min(y_coords), np.max(x_coords), np.max(y_coords)]

# 6. 假设模板图中目标框
boxes_template = [[100, 100, 200, 200], [300, 150, 400, 250]]

# 7. 转换到检测图1
boxes_detect1 = [transform_box(box, H) for box in boxes_template]

# 8. 绘制结果
detect_img1_copy = detect_img1.copy()
for box in boxes_detect1:
    x1, y1, x2, y2 = map(int, box)
    cv2.rectangle(detect_img1_copy, (x1, y1), (x2, y2), (0, 255, 0), 2)

cv2.imwrite('detect1_with_boxes.jpg', detect_img1_copy)
如果你有具体的模板图和检测图,我可以进一步帮你调试代码或调整参数!
分享 已结题
(查看结题原因) 1月5日
创建了问题
7月31日
已结题
(查看结题原因) 1月5日
创建了问题
7月31日


